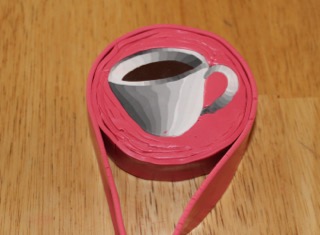
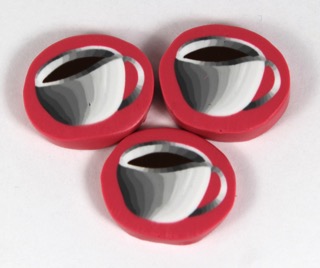
Brought to you by my Cane Builder subscribers. Thank you!!!
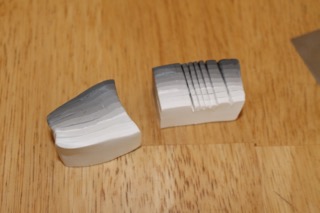
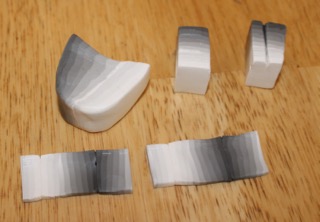
Step 1: Make a grey to white blend (or any color blend you want). You will be slicing it according to the marks indicated. Don’t worry about size as much a approximate proportion.

Step 2: Stat with the biggest piece.
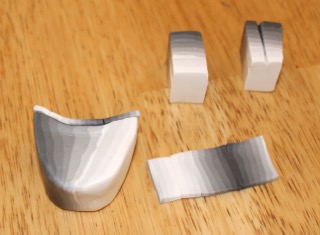
Step 3: Form it into the shape you want for the side of the cup. You can change the shape as you go.

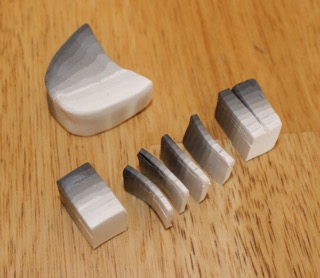
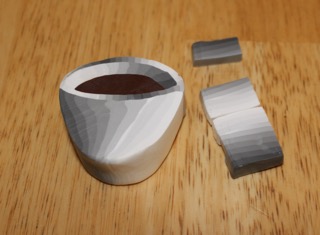
Step 4: Slice four thin slices. This part isn’t entirely necessary, but I like the way it looks. The rim should be very thin. I’ve been very particular about where I want the dark and light, so I’ve added some extra steps.
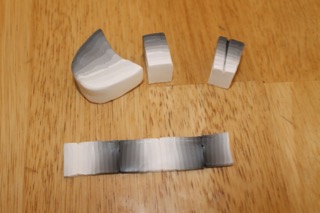
Step 5: Lay the slices end to end with dark and light touching.

Step 7: Slice off part of one dark end as shown above. Attach it at the other end.
Step 8: Cut this newly arranged strip in half.
Step 9: Add one half to the cup shape. Match dark to light and light to dark. Notice the darkest part isn’t exactly touching the lightest part. It will take some work to get it to fit. If necessary, slice off some of the edge to make it fit.
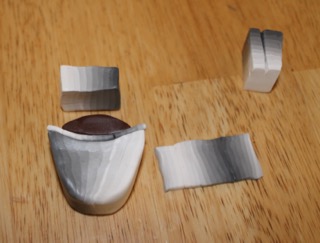
Step 10: Pinch the side of a log of brown clay so that the end looks like a football shape.

Step 11: Cut off the ends of this shape to make it fit and to make nice, crisp, edges. Even thought the pictures show the next three steps attached to the main project, it may be easier to make the coffee, inside wall, and rim all together first and make sure there is a smooth curved edge to add to the cup.
Step 12: Form the next largest section into a thin, curved line that will look like the inside wall of the cup. The light and dark should be opposite from the big side of the cup. Leave room for the rim.
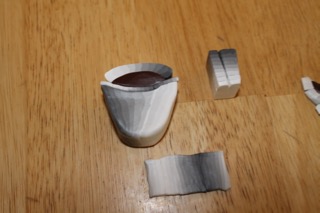
Step 13: Add The rest of the rim. Make sure it looks seamless with the bottom part of the rim. Thats why I said earlier, that you may want to put these three parts together first and then make them all fit the cup together.

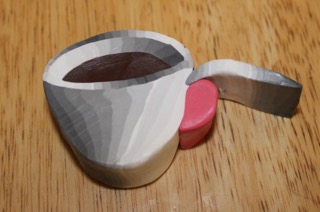
Step 14: Now for the handle. Place the last two piece together with the white touching. Squish these together very well. Otherwise they will come apart. Cut off the darkest part of one end. This little piece will not be used.
Step 15: Attach a teardrop shape of the background color to the side of the cup. Wrap this with the bend that has been formed into a handle. Make sure it’s the shape and size you want. You make have to further squish or slice some off.
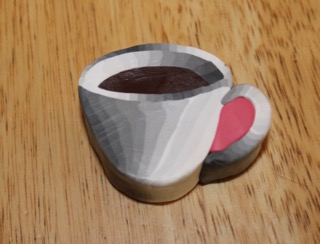
Step 16: Pack in the background. Here are a few pictures of how I did it.

Please come see what’s happening at Cane Builder this month!