How to Make Shiny Polymer Clay Cuff Bracelets Without Glue

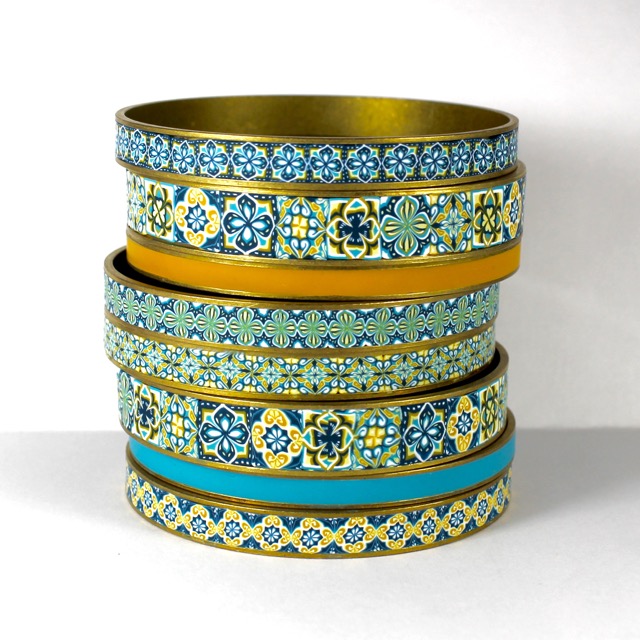
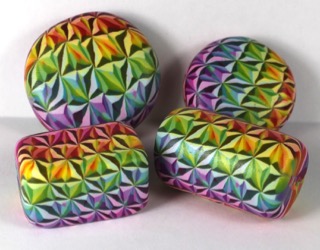
My new favorite thing to make is cuff bracelets! One place to purchase these is at https://www.etsy.com/listing/997931683/cuff-bracelet-with-edges-inlay-cuff

I made a complete video about how to make this bracelets. It can be found at : https://youtu.be/pwB75JME1kU

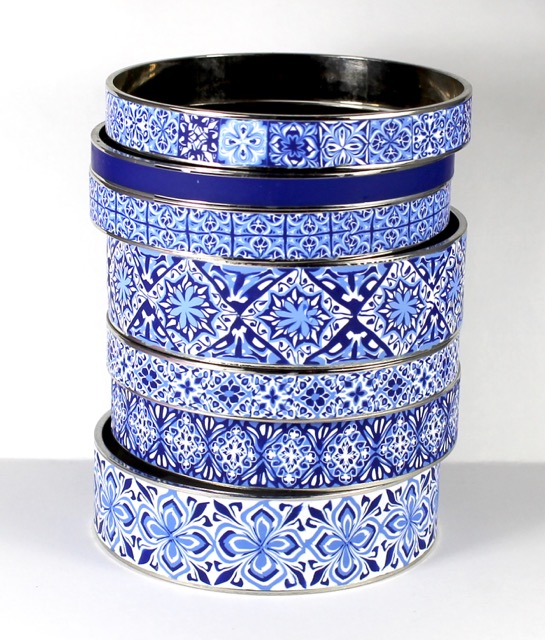
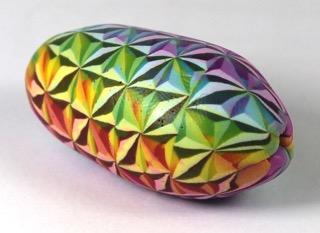
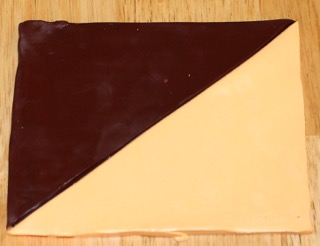
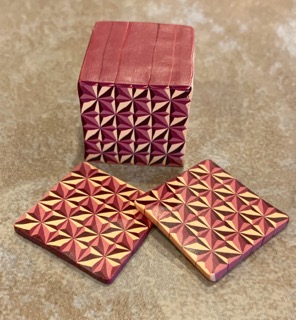
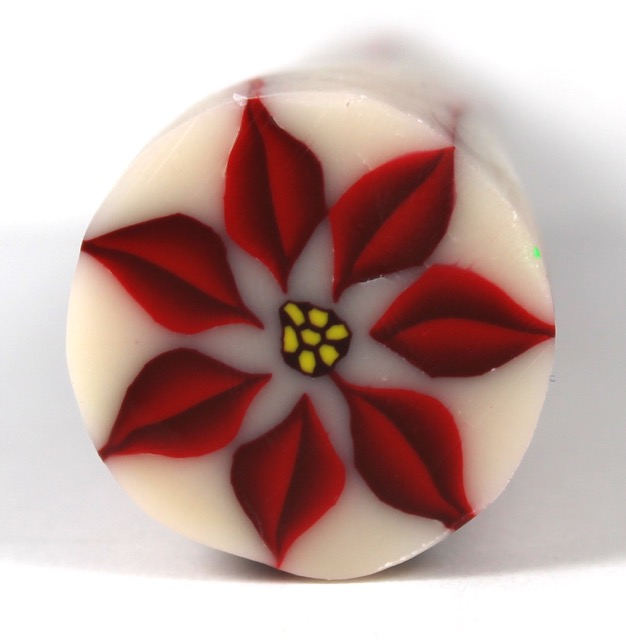
Did you know that if you bake clay face down on glass, every part that is touching the glass looks like glass!!! This is especially helpful for canes with translucent polymer clay. If you’ve ever experimented with translucent, you quickly realize that it’s no as see-through as you hoped. However, just like agates in a rock tumbler, translucent clay is much more translucent after being sanded or coated in resin. The easiest and most effective way of all is to simply bake it against glass (watch out for air bubbles and burning!). Unfortunately, most projects aren’t perfectly flat, so this trick is useless. Guess what!? These bracelets can be baked flat! (as you already know if you just watched the video).

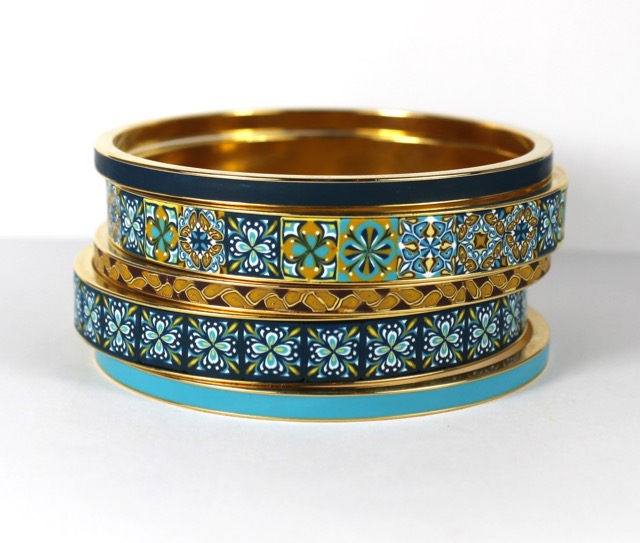
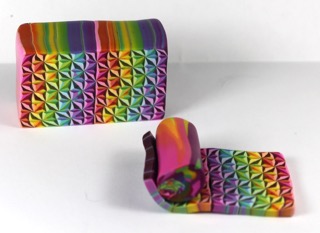
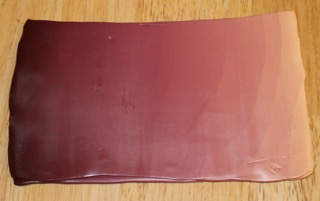
When these strips are thin enough, they bend very easily. The beauty of these bracelet blanks is that all you need to do is to insert the strip into the end pockets and crimp them shut.

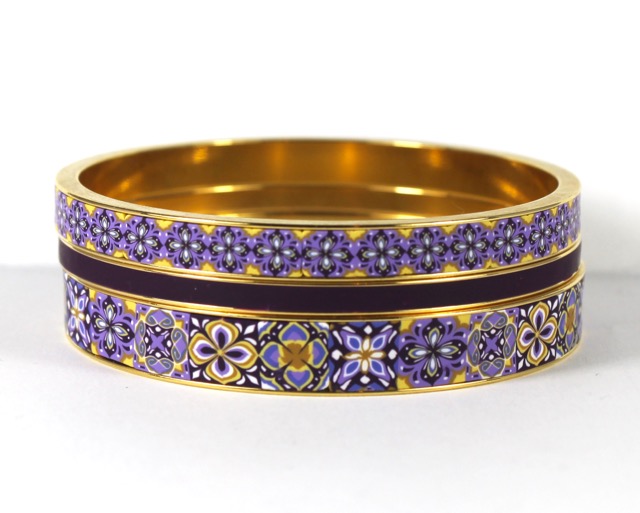
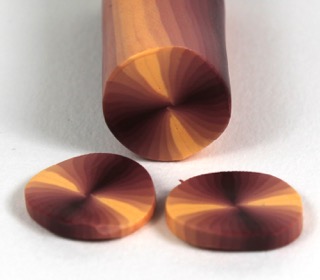
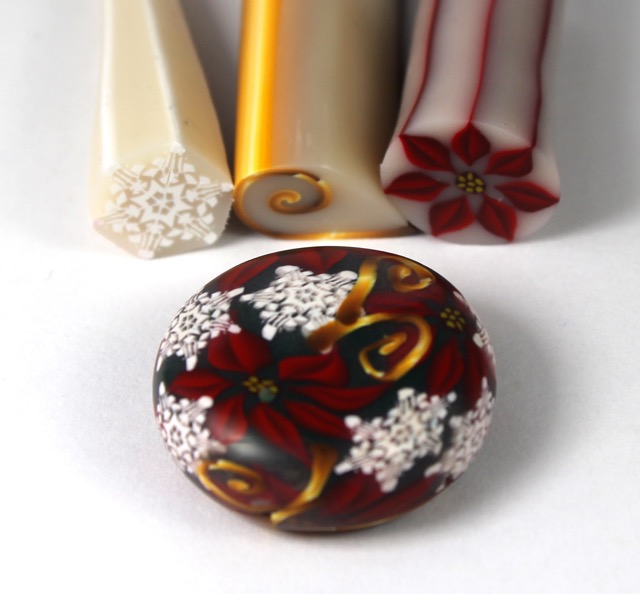
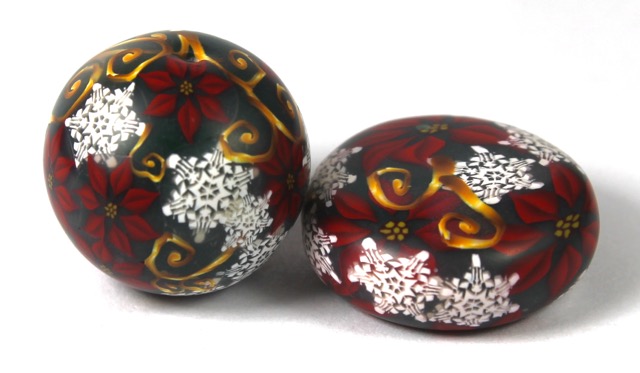
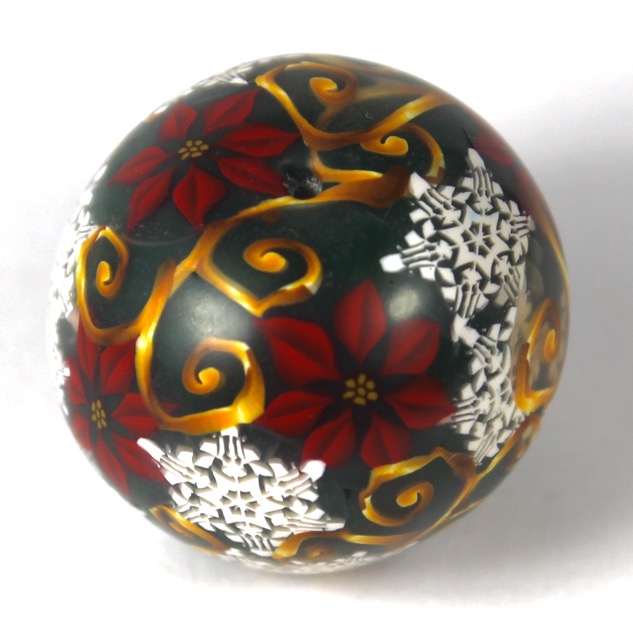
Now, I have to admit, making the thin strip isn’t easy. You don’t have to make them nearly as complicated as I have here. Most of these canes are taught somewhere on my Patreon page. https://www.patreon.com/polymerclayworkshop

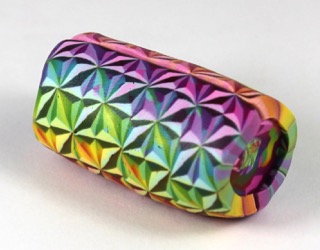
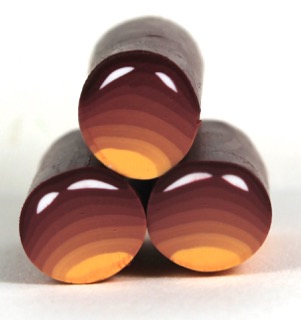
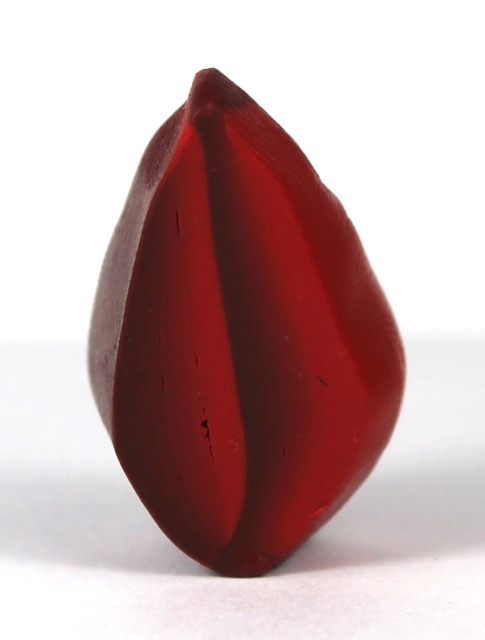
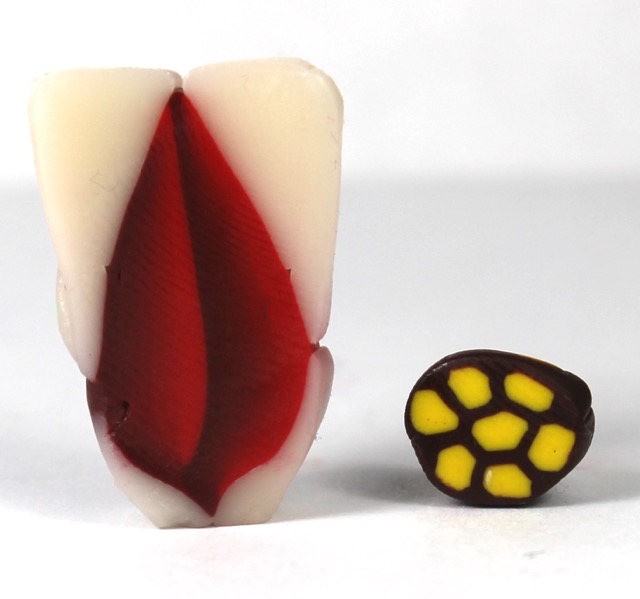
Also, many of these canes feature a unique murrini technique that is also taught on Patreon. These canes rely on translucent clay and are most effective when they are shiny.

Posted in Uncategorized | Leave a comment

Cernit Polymer Clay Green Skinner Blend

Here is another green blend. I hope you can start to see how you can change the blend to fit your specific needs. Remember to adapt this to fit the whole width of your pasta machine. Click for the printable stencil here.

Posted in Uncategorized | 2 Comments

Cernit Polymer Clay Purple Turquoise Blend

I love this blend! You could just go from purple to turquoise, but I wanted just a little more contrast so I added white. Here is the printable stencil. Or you can make your own to fit the width of your pasta machine.

Posted in Uncategorized | Leave a comment

Cernit Polymer Clay Gold and Copper Blends

I’m excited to be adding to my new Cernit color blend directory! Many of you know that metallics effects are my favorite. The “copper” and “gold” are very similar. In my opinion “poppy red” in Cernit looks more like dark orange, but the extra red in it makes in look more copper to me when it goes in the blend. Here is the printable stencil. Be sure to adjust it to the width of your pasta machine.

Posted in Uncategorized | Leave a comment

Cernit Polymer Clay Spring Green Skinner Blend

I’m back to making blend templates! Unfortunately, I can no longer find the Premo colors that I used to make all of my previous blend. Nevertheless, all of the only templates are still a very good guide for what is possible. For this blend, I wanted a green that would blend from very dark to very light without the dark completely overwhelming the light. No matter what brand you use, the important thing is to curve the darkest color. I also made the darkest color stretch across most of the blend so that there would not be an obvious line in the blend where the color stopped. Download the printable template here.

Posted in Uncategorized | Leave a comment

Stacking Tile Bangles in Polymer Clay Millefiori

I’ve continued my journey into making jewelry with my canes. I searched for bracelet blank, blank channel bracelet, and blank inlay bracelet. Here are two of the shops I found. KJewelry Metal, Yakutum, Natalie Parker Designs, and TDS Online store.

These canes are from the October 2020 issue of Cane Builder on Patreon.

Just looking at these tiles makes me think of adventure and travel.! My favorite thing is matching the different patterns and colors. I love the thin little solid bangles that break the complexity and tie the colors together.

Possibility is my favorite word.

At the time of writing this post a few of these bracelet are still available in my Etsy shop. https://www.etsy.com/shop/PolymerBeadWorkshop

Posted in Uncategorized | Leave a comment

Polymer Clay Dangle Slab Earrings

I’m so busy making and designing canes that I seldom take time to make anything with them! This month’s cane tutorial on Patreon makes beautiful slabs. I decided to try my hand at these shape earrings everyone has been making. There are endless shapes to choose from. I decided to try to find shapes that seem uniquely suited to these specific slabs. Here are some of my favorite shapes at the moment. I especially like the rectangles. There is no waste and no special cutters needed. The Blue Bottle Tree has some great information for making earrings, so there’s no need for me to repeat it. I totally recommend her use of templates to save tons of money on cutters. Here are some of my first earring ideas. Feel free to copy and sell them. I have a few in my Etsy shop, but soon I’ll be on to more experiments. I’m excited to try some more jewelry now that I’ve taken the plunge.

Posted in Uncategorized | Tagged , , | Leave a comment

Polymer Clay Rainbow 3D Star Cane Beads

I’ve been making canes for years. It’s finally time to make them into something! I’ve open a new Esty shop, PolymerBeadWorkshop, where you can get inspiration for all the many ways to make canework beads. The tutorial for this pattern is on my Patreon page.

Here I’ll show one way to make beads with a rectangular, geometric cane. If you had a square cane, like a kaleidoscope or tile, you could do this same thing by putting two side by side to make a rectangle.

If rainbow isn’t your thing, try to imagine this with the most beautiful kaleidoscope canes you’ve seen.

Cane slice beadPolymer clay cane rainbow bead

  1. Cut a slice and wrap it around a log of clay. It takes some time to get the seam to fit perfectly. You can adjust the size of the log, or press and pull at the slice until the sides come together as smoothly as possible. If the clay is too sticky, let it set. If not, it will stick too soon and you won’t be able to make adjustments.
  2. Slowly roll and pull the clay together to cover the log. This takes some practice.
  3. Now that the log is covered it can truly be formed into any shape. For the round flat beads or cabs, I roll it into a ball and then flatten in.  Actually for most shapes I form it carefully into a ball before I decide what’s next. However, for this particular design, rectangular or cylindrical seem to be the easiest and most effective.

polymer clay 3d cane beadPolymer clay 3D rainbow star beads

Posted in Uncategorized | Leave a comment

Polymer Clay Bronze Blend

There are many ways to make metallic looking blends. Here is one way to make bronze.

Premo brand:

the dark is 2 parts cadmium red : 1 part black

the light is 3 parts white : 1 part orange

bronze template2bronze blendbornze color disksbronze jewel canes

Here I’ve used four solid shades for this blend to make the cane from the 3D Star cane on Patreon.

3D polymer clay star cane

Posted in Uncategorized | Leave a comment

Polymer Clay Poinsettia Cane


Polymer Clay Christmas pattern canes

The snowflake and gold canes are on my Patron site. The following instructions are for the poinsettia cane.

Step 1: Make a blend and stack it. Here is a video I made a long time ago about how I stack blends. I used Premo brand: half Pomegranate Red and half dark red which mixed from 1 part Pomegranate to 1 part black. Don’t blend directly to black. It’s already pretty dark. Add one more sheet of red, or even red mixed with a little white to the top of the stack if it looks too dark.

Step 2: Reduce the blend so that it’s like a long rectangular cane. Cut it in half and stack it so that one dark side is touching one light side.

Step 3: Formed the block into a petal shape by pinching the top and bottom of the block together along the whole length of the cane.

polymer clay poinsettia cane petal

Step 4: Pack in the background of the petal. Use only a tiny bit at the bottom. I do this by making logs of translucent clay and then pinching and forming them to make exactly the shape pictured below.

Step 5: Make a center by taking a small amount of yellow and rolling it into a log. Wrap the log in the leftover dark red or brown or black. Cut the roll into seven equal sections and arrange them as pictured. Reduce this new can and use only as much as you need to fit the center proportionally. You can always use any left over center for other flowers.

Poinsettia cane tutorial

Step 6: Reduce the petal cane and slice it into 7 sections. Arrange them around the center.

Polymer Clay Poinsettia cane tutorial1

Polymer clay Christmas cane beadsPolymer Clay Poinsettia Cane Bead


Posted in Uncategorized | Leave a comment